Nitro RC Helicopter Starting Methods
by John Salt
 Nitro RC Helicopter Starting Using An External Electric Starter & Shaft
As we discussed in the nitro RC helicopter engine basics section, like every other internal combustion engine, you need to spin the engine over in order to start it.
For most RC aircraft, this means using an external electric starting motor to save on flying weight. There are basically 4 ways this is accomplished on Nitro powered RC helicopters.
1. Nitro Engine Shaft Starting
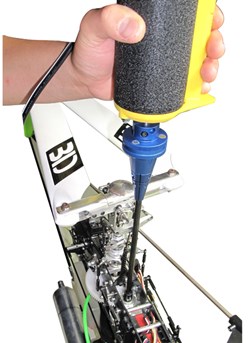
As pictured in the above photo, by far the most popular way to start a nitro powered RC helicopter is by a starting shaft and external electric starter.
In fact, this has become the only method of starting a nitro powered RC helicopter these days. The other two methods I'm also going to show, have more or less been phased out.
An internal shaft inside the helicopter runs from the engine clutch up and out through the top of the helicopter. There will be a small cone or hex head on the end of this shaft that provides an easy method of "mechanically connecting" the external starting shaft to the internal shaft.
The external shaft is mounted onto a standard 12VDC hand-held electric starter that most nitro, and many gas RC airplane hobbyists are intimately familiar with.
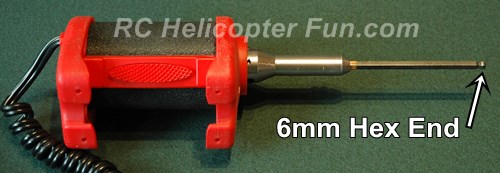 Hand Held 12V RC Starter With Hex Starter Shaft Mounted
Pictured above is my hand-held electric starter with the starting shaft mounted.
Pictured below is the layout of the components of a starting shaft system on one of my nitro RC helicopters.
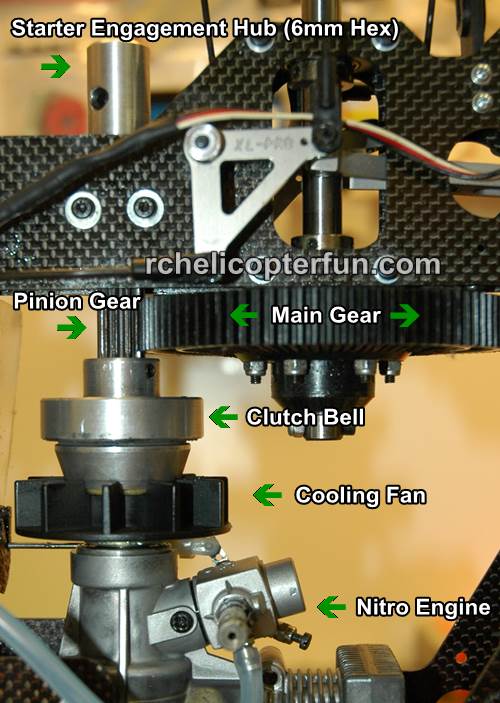
This starting system is the most convenient method of starting a nitro RC heli engine, which has endured and out lasted the rest, but it does has a couple of draw backs you should be aware of.
Starter Extension Damage
The biggest issue with the starter shaft extension is the extension itself. When you are removing it from the cone or the hex head after the engine has started, it can spin out & hit your swashplate or rotor head pushrods and bend them or break a ball link.
I have found a very good cure, and this problem almost never happens to me anymore. Make sure your starter extension is rotating perfectly true - no wobble whatsoever.
I simply "smear" a small amount of epoxy around the electric starter output shaft when installing the extension shaft. I ensure the extension is running true with a dial indicator before the epoxy sets up. Once the epoxy sets up, it essentially has become a thin, customized centering collar between the extension and starter shaft, and will "hold" the extension straight and true.
If you ever have to remove the extension off the starter, it just takes some effort with the epoxy in there. A little heat can also help soften the epoxy if it's really being a stubborn bugger.
The next tip is to make sure you always lift your starter extension straight up off the cone or the hex head. This goes without saying, but when you are pumped to go flying, sometimes we all forget the most basic steps.
If you follow these two simple steps, starter extension damage will seldom be an issue for you.
Starter Shaft Vibrations
This next problem has pretty much been solved with all newer heli kits, but you should know about it. Like the cooling fan , the internal starting shaft that is connected to the centrifugal clutch, is spinning at the same speed as the engine. If there is any misalignment of the shaft/clutch to the engine, it will cause high frequency vibrations.
Just as with fan vibrations, starter shaft vibrations can be identified by fuel tank foaming. If not corrected, the aluminum side frames will usually start to show stress cracking around the starting shaft bearing block, or you will find your starting shaft support bearings are wearing out very quickly.
RC helicopter manufacturers have gone to great lengths to minimize this problem by allowing some articulation angle between engine/fan hub, and centrifugal clutch and starting shaft. Generally some sort of isolation bushing/s between the engine and the clutch face are used so critical alignment is not as important as it once used to be.
That said, you should still take your time to make sure the engine cooling fan hub is level (perfectly parallel) to the clutch face to minimize any possible vibration.
2. Nitro Engine Belt Starting
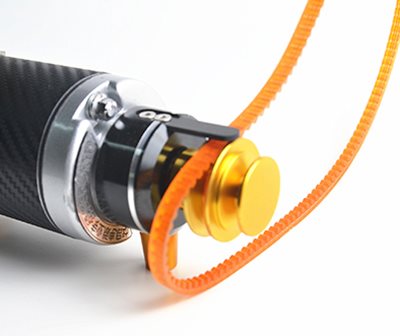 Nitro RC Engine Belt Starting
The second most common method of starting a nitro RC helicopter is by using a small belt.
You will loop this belt around a machined groove on the top of the fan assembly or bottom of the clutch assembly that is attached to the output shaft of the RC nitro engine in the heli.
You then loop the other end of the belt around a matching groove on your electric starter hub to spin the belt and the engine.
This system eliminates the starting shaft and any vibrations that might be associated with it. It also reduces the number of parts, weight, and cost of the helicopter kit. Of course if you ever want to put a scale fuselage on your nitro RC helicopter, this system won’t work because you won’t be able to access it.
I did have an RC nitro helicopter once that used this system, and I found it very awkward, difficult, and frustrating! You have to put quite a bit of side pressure on the starter and belt so it doesn’t slip (oily nitro goo certainly doesn't help the situation). With the other hand you have to keep the helicopter secure.
Because the belt is looped around the clutch and fan below the pinion and main gear, it can't be removed and has to stay in the helicopter. After the engine is started and running, you must secure the belt. Holding tabs on the cooling fan housing or frames are usually used for this.
The one issue I experienced with the starting belt is there was always the possibility the belt could vibrate loose during the flight, or that I simply forgot to secure it in my excitement to get airborne. On several occasions, the belt then jammed between the the fan & clutch and chewed the hell out of the belt or caused the engine to stop - a constant PIA hassle I found.
3. Nitro Engine Rear Cone Starting
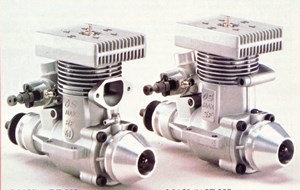 OS Max Nitro Helicopter Engine Rear Cone Start
The third and very rare nitro RC helicopter starting method is by using a special nitro RC helicopter engine that has a starting cone on the back end of the engine which is attached directly to the crankshaft.
You simply started the engine by engaging the cone with your electric starter from underneath the helicopter, very similar to pressing the starter up to the propeller spinner on an RC airplane.
As with the belt start system – you don’t have to worry about starter shaft vibrations and the associated parts and extra weight. However it is awkward in that you have to turn the helicopter over on its side to engage the cone.
This was a royal PIA in for most people, and why this rear cone starting method never really caught on, not to mention the engines were overpriced. Mechanically speaking however, it was the most elegant yet vibration proof starting method in my opinion.
There were very few engines manufacturers that built these types of engines (OS Max being the only one I know of) and very few helicopter kits that support them.
4. Nitro Engine Recoil/Pull Starting
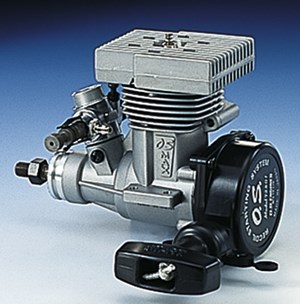 OS Max 32F-HX Recoil Start Nitro RC Helicopter Engine
Last up we have a nitro RC helicopter starting method that doesn't use an external electric starter at all to the turn the engine over - the "pull" or "recoil" starter.
The nitro RC car and truck folks will likely be very familiar with the recoil pull cord starting method, or anyone who has used any sort of gas powered tool for that mater; but it is actually rare on nitro powered RC helicopters.
I also don't know of a singe nitro RC engine manufacturer that still has a recoil in their RC helicopter engine lineup anymore.
The obvious reason is all the extra weight a recoil mechanism bolted to the back of the engine adds. Fit and access to the pull cord can also be difficult when frames are in the way. And forget about scale since you can't access the pull cord; unless you want to cut a massive hole in the side of your fuselage. I don't think so!
Powering Your Glow Plug
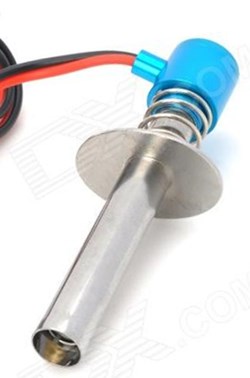
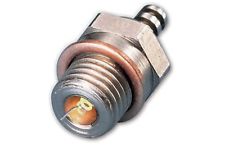 RC Nitro Engine Glow Plug
So, we have covered all the ways to spin a nitro engine over to start it, but what about powering the engine's glow plug, while we spin the engine over?
Nitro engines are after all commonly called "glow engines", due to that little glow plug, and it must be glowing while the engine is starting and running in order to ignite the air/fuel mixture.
When starting a nitro engine, you need to initially send apx. 1.5 VDC to the glow plug to make the platinum element inside glow. Once the nitro engine starts, the compression along with the platinum's catalytic reaction keeps it glowing.
There are basically 3 ways to power a glow plug while starting a nitro engine:
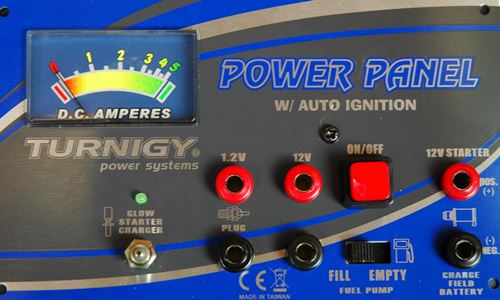
- Power Panel With Glow Plug Starting Wire
- External Glow Driver
- Internal Glow Driver
Lets look at each of these methods a little closer...
The power panel method utilizes (as the name suggests), a panel that is generally powered from a 12 VDC battery which is mounted on your RC field box.
This panel will power items such as our 12VDC electric starter, electric fuel pump, and our little glow plug.
There is a voltage regulator circuit or high current resistor/s within the panel to drop the 12 VDC to around 1.2 to 1.5 VDC to heat up the platinum element inside the plug and make it "glow". Higher voltages much over 2.0V will burn the element out.
A special glow plug powering plug as show here is plugged into the power panel's glow plug power outputs by way of two 4mm banana plugs.
The plug is snapped onto the end of the glow plug while you start the engine. Once the engine is running, you remove the power plug. If you leave it on too long once the engine starts, you risk burning the glow plug out.
Easy access to the glow plug is required and on some nitro powered RC helicopters, the glow plug is hard to access. It's therefore not an option for scale or helicopters that don't have easy access to the plug (many don't).
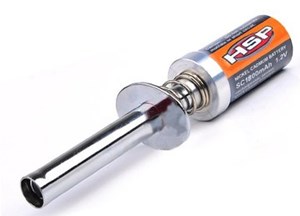
Another common glow plug powering method is by way of a stand alone external glow driver as shown here.
This is basically the same thing as the power panel glow plug powering plug, less the power panel and wire harness to the panel.
There is generally a single 1.2V NiCad or NiMh cell in the glow driver to power it.
You simply snap it onto the glow plug, the plug will glow, and you remove it once the engine is started and running.
Again, having easy access to the glow plug is required.
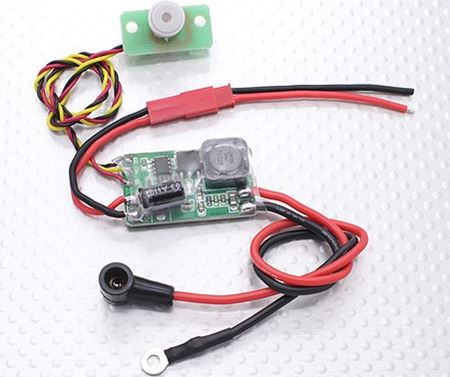
Last up is the Internal Glow Driver.
As the name suggests, these little circuits are mounted right inside the aircraft and the powering plug is permanently attached to the glow plug - just like a spark plug boot.
Internal drivers can be powered off the RX power, but many people use a separate battery for them. They are regulated to supply a safe voltage to the glow plug regardless of input voltage.
Some internal glow drivers can be activated remotely through a spare channel on your RC radio, or will have an external switch that will cause the glow plug to power up for about 10 to 20 seconds while you spin the nitro engine over with your hand held starter.
Internal glow drivers are very popular on RC helicopters and planes these days since having easy access to the glow plug is not required and they are very convenient and quite inexpensive.
Nitro RC Helicopter Starting Safety
One very important point I didn’t mention but it holds true for all these nitro RC helicopter starting systems... The engine has to be set at idle when starting.
If it isn’t, you will find yourself in the way of quickly accelerating rotor blades.
I can’t tell you how scared I was the first time I started a nitro RC helicopter. Even though I must have checked to see if the throttle was in the idle position a dozen times. I had this fear in the back of my head that something would cause it to start at full throttle.
I occasionally & accidentally start a nitro RC helicopter with the throttle set at a high speed or have my throttle hold switch turned on. As long as you are holding onto the rotor head and immediately throttle down or kill the engine you will not get hurt or damage any parts on your heli such as the clutch or rotor head.
The quickest way to stop the engine is by plugging the exhaust outlet on your muffler with your finger. This is much easier than fumbling around trying to pinch off the fuel line; in most cases that will actually make the engine speed up initially for about 4-6 seconds.
As an Amazon Associate I earn from qualifying purchases.
